Wednesday, August 24, 2011

Taco Pasta


When I first saw this recipe, I though it sounded weird, but figured, what the hey, I'll give it a whirl. I was pleasantly surprised! I loved it! So did the kids and hubby (that's always a plus, right?).  Don't you love it when things work out like that? This is definitely a dish that will be make a visit to our table many, many times (It's already made a few visits).

1 pound ground beef
4 oz. cream cheese
1 teaspoon salt
1/2 teaspoon chili powder (more if you like it spicey, less if you don't like spice)
18 jumbo pasta shells
2 tablespoons butter, melted
1 cup taco sauce ( 1 pkg taco seasoning in 1 cup of water)
1 cup shredded Cheddar cheese
1 cup shredded Monterey Jack cheese
Optional ingredients: tomatoes, green chilies, onions, olives, and anything else you like on your tacos

In a skillet, brown beef over medium heat until no longer pink; drain. Add cream cheese, salt and chili powder; mix and simmer for 5 minutes. While you’re cooking your meat, bring a large pot of water to a boil. Add pasta and cook for 8 to 10 minutes or until al dente; drain. Toss cooked shells in butter.

Preheat oven to 350 degrees F (175 degrees C). Fill shells with beef mixture and arrange in a 9x13 inch baking dish;


Pour taco sauce over shells. Cover with foil and bake in for 15 minutes. Remove dish from oven and top with Cheddar cheese, Monterey
Jack cheese and tortilla chips; return dish to oven to cook for 15 minutes more.
Let it set for a few minutes before serving.


This would also freeze great, you would have to freeze it in the dish though.


Tuesday, August 23, 2011

Fauxreos


I have been wanting to try this recipe for awhile, but have been a bit iffy about it.  I wasn't worried about them not tasting good, but I thought they would turn out more like whoopie pies than oreos.  Now, they don't taste like the real deal, but I like them. I think if I got my hands on some dark cocoa, they would be pretty close.  I am quite pleased with how they turned out.  In the words of my 2 1/2 year old "Mom!  They're 'licious!"  


1 1/4 c. flour
2/3 c. cocoa
1 tsp baking soda
1/4 tsp baking powder
1/4 tsp salt
1 c. sugar
1/2 c. +  2 tbsp butter, room temperature
1 egg

Preheat oven to 375.  Combine flour, cocoa, soda, powder, salt and sugar.


Mix in butter and egg until well-combined. Make sure the butter is slightly softened or it won't mix in that well.  If you look in the picture below, you can see some butter chunks because I was impatient.  Then I had to let the dough sit for awhile while I waited for it to soften so it would mix right.

(not quite mixed enough)


Roll dough into small balls, place on greased cookie sheet.  Press the balls into circles, either using your hand or the bottom of a cup.  If you want fun shapes, press flat and then use a cookie cutter to cut out the shape.


cook for 9 minutes.  Let cool for a few minutes on the cookie sheet, then remove to a cooling rack.


When cookies are completely cool, pair up the cookies, place frosting on the bottom of one and place another cookie on top.  Easy peesy!

Frosting
1/2 c. shortening
1/4 c. butter
2-3 cups powder sugar (add until you get the consistency you want, you want it to be thick, but spreadable)

Filling flavorings:
3 tsp. vanilla extract
3 tsp peppermint extract

Combine shortening, butter, and sugar.  Mix until very well combined and you reach the consistency you want. If you want the cream filling, add 3 tsp vanilla.  If you want mint stuffed, add 3 tsp. peppermint, or divide the dough in half and do both.  To make them festive, add food coloring to the filling.

I think this would be a fun thing to do with the kiddos too.  They could spread the frosting and then make the cookie sandwich.  I also love how much you could change this up with different flavors of frostings.  I know someone (*cough*Teresa*cough*) who has a bazillion extracts and I think it would be fun to play around with teh different flavors for the frosting: coconut, raspberry, almond, strawberry, marshmallow, just to name a few.   You can add different colors to match the holiday or if you are doing them for a party, you can do it in teh colors of the party.  I am also going to try a pumpkin filling come fall.  I love pumpkin flavored things. =)


Thursday, August 18, 2011

Donut Holes


One thing that I love to snack on (but luckily don't do it very often) are donut holes.  They are the perfect size to just pop in your mouth.  But as we all know, donuts aren't exactly fat-free (we all wish, right?).  Well, I may have found a solution, or at least a good substitute.  One of my favorite bloggers, One Crazy Cookie, posted this recipe this week and I just had to try it!  I love it!!   It's pretty much a min-muffin, rolled in cinnamon sugar.  It tastes like a donut, but minus the 20 gallons of grease it's fried in.   I want to experiment with different types of glazes too =)  The only thing I didn't like was that it only made 24 =).  So of course, I made two batches, well, I had to because my hubby wanted to take some to work with him.


1/2 c. sugar
1/4 c. butter, softened
3/4 tsp. nutmeg
1 tsp. vanilla
1/2 c. milk
1 tsp baking powder
1 c. flour

Preheat oven to 375.  Combine all the ingredients in a bowl.  Spray a mini-muffin sheet with non-stick spray. 


Make sure you have a cute helper on hand to help taste the batter and lick the bowl clean. (especially since there are no eggs!)

Scoop about 1/2 tbsp into each cup.

Bake for 15 minutes.

1/4 c. butter, melted
1/2 c. sugar
1-2 tsp cinnamon (depending on how much you love cinnamon....I used 2 =)  )


When your muffins are done, roll them in butter.  I would recommend only doing the top and sides. 

Then roll in the cinnamon sugar.

Make sure your helper gets to eat some of the finished product. =)


If you want to get the kids involved, this would be a great one to have them help with.  Especially since they are so small, the perfect size treat for little ones.


Saturday, August 13, 2011

Chocolate Stuffed Chocolate Chocolate Chip Muffins

While grocery shopping my cart somehow turned down the snack food isle (maybe because it was my husband at the helm?).  While browsing, I saw these snack cakes that were chocolate muffins that had a gooey chocolate center.  They looked good.  Of course I've been craving chocolate the past few days (oh the joys of being a woman, right?).  Then I saw the price.  I think they were around $3.50 for 6 small muffins.  Forget that!  I'm a cheapskate.  So what do you think I did?  Yup, came home and looked up recipes, took a little from this recipes, a few from this recipe, and some tips here and there and made my own recipe.  I have been wanting to make some chocolate muffins for awhile anyway, these just gave me the push I needed.
Do you think I put enough chocolate?  Me neither, but there's always next time ;)

4 1 oz.squares bittersweet baking chocolate squares (if you don't have any cocoa, feel free to use 6 squares)
1/3 c. butter
7 tbsp. unsweetened cocoa powder
6 tbsp. sugar
1 tbsp. shortening

3/4 c. milk
1/2 c. sour cream
2 eggs
1 1/2 tsp. vanilla
3/4 c. sugar
1 2/3 c. flour
1 tsp. baking soda
1/2 tsp. salt
1 c. chocolate chips
Rolos, or Hershey's bar ( I used dark chocolate)

Preheat oven to 400 degrees.  Melt baking squares and butter.  Stir in cocoa, 6 tbsp. sugar, and shortening until all the chocolate is combined.  In a separate bowl, combine 3/4 c. sugar, sour cream, eggs, and vanilla.  Stir in chocolate and mix until well combined.  Stir in flour, salt and baking soda.  Add in chocolate chips.
Line a muffin tin with muffin/cupcake liners.  Lightly spray with non stick spray (it helps the muffins to come out of the liners better).  Spoon about 2 tbsp. of batter into each cup.  Press an unwrapped Rolo or break off 2 squares of the Hershey's bar.  Spoon another couple teaspoons over the candy. 

Bake for 18 minutes or until a toothpick comes out clean.  Let them cool for a few minutes before removing them from the tin.  Serve with a big glass of milk and enjoy!  (believe me, you will enjoy these!)

Here's a tip on chocolate chips:  in order to keep them from sinking in the batter, place them in a sandwich bag, spoon in a bit of flour and shake until they are well covered.  Then when you add them to the batter, fold them in.

This recipe makes approximately 2 dozen.  They freeze great too.  With school starting, these would be a great quick breakfast, great treat in the lunchbox, or a yummy after school snack.


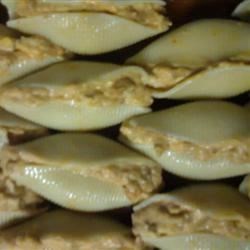
This is how they turn out if you don't put the extra batter on top....so if you want it to show through you don't have to cover =)

My disclaimer:  I know the title said chocolate stuffed, but I forgot to take a picture of the chocolate ones, so you get pictures of the Rolo stuffed ones =)  Both are good =)  But the original idea was with the Hershey's and I did the Rolos as a "I wonder how these would be" side notes.


Wednesday, August 10, 2011

I know these are out of season, but I still love them!!! Most people only like to eat them around Halloween and Thanksgiving, but I love these anytime of the year. Also, most people cheat and use the spiced cake mix to make them. Lame!! It's so much more fun to make them from scratch. Everyone in my house loves these, except my hubby, but that's because his mom used to make them all the time when he was younger and now he doesn't like them. Oh well....more for me =) Plus, since I used wheat in these he won't come near them....he's won't go near anything healthy. I love him anyway =)

1/4 c. shortening
1/4 c. butter
1/2 c. white sugar
1/2 c. brown sugar
1 egg
1 tsp. vanilla
1 c. pumpkin puree
2 c. whole wheat flour
3/4 tsp. baking soda
3/4 tsp baking powder
1/2 tsp salt
3 tsp. cinnamon
1/4 tsp nutmeg
dash cloves
1/4 tsp pumpkin pie spice
1 c. chocolate chips (or more if you want =) )

Preheat oven to 375. Cream shortening, butter and sugars. Add in egg and vanilla. Mix in pumpkin, spices and chocolate chips. In separate bowl combine flour, soda, baking powder and salt. Add to wet mixture. Drop the dough by tablespoons onto a greased cookie sheet. Bake for 10-11 minutes.

These cookies don't spread a whole lot so feel free to plop them close together. These cookies won't have a crunchy texture, but will be soft and cake-like. They stay nice and moist too. =) Feel free to add more spices to the batter too, that way you have a good excuse to eat the dough....you're "testing" it. I know I had to "test" my dough several times and then had to "test" a cookie (or 2) from each batch out of the oven to make sure they were good enough for everyone else.

Friday, August 5, 2011

Raspberry Lemon Cupcakes

I have had this idea stewing in my head for a couple days so I finally decided to try it out.  I wanted to see if I could use a plain cupcake base and add raspberry extract to give it the raspberry flavoring, without the fruit, since raspberries aren't always in season and I get cravings for fruity stuff out of season. =)
This didn't turn out completely as I had planned, I had to do a bit of tweaking, but in the end it turned out good.  Different than I had planned, but it'll satisfy my fruity sweet tooth.

1 c. sugar
1/4 c. butter
1/4 c. shortening
2 eggs
2 1/2 tsp raspberry extract
1 1/2 c. flour
1 3/4 tsp baking powder
1/2 c. + 2 tbsp. buttermilk ( add 1 tbsp. vinegar to equal amount milk if you have no buttermilk, or just plain milk)

Preheat oven to 350.  Cream butter, sugar, and shortening until smooth.  Add eggs and mix until mixture is smooth.  Add raspberry extract. Mix well.  Add baking powder and flour.  Add in milk.  Mix until smooth.  Line muffin pan with cupcake liners.  Fill each 2/3 full of batter. 

Bake 14-15 minutes or until toothpick inserted comes out clean.  Let cupcakes cool completely before filling or frosting.


While cooking, make the frosting and filling

Filling
1 tbsp. shortening
1 tbsp. butter
2 tsp. raspberry extract
1- 1 1/2 cups powder sugar
6-8 tsp. milk

Combine all the ingredients, adding milk by the teaspoon until it reaches the desired consistency.  You don't want it too thin, you want it the consistency of frosting.

Frosting
4 oz. cream cheese
1/4 c. butter
2- 2 1/2 c. powder sugar
1 1/2 tbsp lemon juice.

Combine until smooth.  Add more powder sugar until it reaches the consistency that you want, thick enough to spread on and keep it's shape.

You can add the filling 2 ways, you can either cut a hole in the top, spoon in the filling and cover the hole with the piece of cupcake you cut out.  Or you can use a decorating tip, poke a hole int eh top and squirt it in.  I dont' have a decorating tip so I used my husbands nifty thingy that he uses to inject turkeys with marinade.  I just take the needle off. 

Once the cupcakes are filled, frost and decorate however you would like. =)  Add food coloring to make bright colors for the frosting and cupcakes.


Pizza Casserole

One of my family's favorite foods is pizza.  But there are only so many ways/times we can do a homemade pizza.  I needed to change things up.  I found this recipe over at One Crazy Cookie and loved it!  The only thing I really changed was to use homemade biscuits instead of store bought ones.


1 pound hamburger or sausage

2 cups spaghetti sauce
4 cups shredded mozzarella cheese
1/2 c. Parmesan cheese
Whatever pizza toppings you like or your family likes
Biscuits
2 1/4-1/2 cups all-purpose flour

4 teaspoons baking powder
3 teaspoons sugar
1/2 teaspoon salt
1/2 cup shortening
1 egg
2/3 cup milk

Preheat oven to 400 degrees. Spray a 9x13 dish with non-stick spray

In a small bowl, combine the flour, baking powder, sugar and salt. Cut in shortening until the mixture resembles coarse crumbs. Beat egg with milk; stir into dry ingredients just until moistened.

Turn onto a well-floured surface; knead.

Break dough into little pieces and place in bottom of dish. Top with about 1 1/2 cups cheese.


Brown the hamburger, drain the grease and stir in spaghetti sauce.  Pour over the biscuits.


Top the sauce mix with whatever pizza toppings your family likes.  Then sprinkle remaining cheese on top and spread pepperoni on top of the cheese.

 Bake for 20 minutes.  Let cool 10 minutes before serving.  Enjoy!!


This also will freeze great too.  Just divide the ingredients between 2 dishes (8x8 pans) or double the ingredients.  In the dish you want to freeze, line with foil, spray with non-stick spray, and place in freezer.  When it is frozen, remove from pan and wrap with foil and place in freezer bag to be enjoyed later. =)


Tuesday, August 2, 2011

Chocolate Mint Chocolate Chip Cookies


Last night my hubby asked me if I would make some treats for him to take to work for their "guys night." They just wanted something simple like chocolate chip cookies, but we decided to do mint chocolate chip cookies. As usual, they turned out pretty good. But it got me thinking, these would taste good with more mint but I don't think the mint would go that well in the regular dough. Then it hit me....I made these super awesome chocolate fudge cookies a few weeks ago for my 4-layer cookie bars, why don't I use that and then just add some mint to it. So, viola! I did. I was pleased with the results (if I wasn't there is no chance they would end up on here =) ) There was just a hint of mint, not too overpowering.

1 stick butter
1/2 c. sugar
1 egg
3/8 c. brown sugar
1 1/2 tsp mint extract
7/8 c. flour
1/2 tsp soda
1/4 tsp salt
1/2 c. cocoa
1 c. chocolate chips

Preheat oven to 350 degrees. Cream butter and sugars together. Add in the egg. Add in mint. In a separate bowl combine cocoa, flour, salt, and soda. Add to the wet mixture.

Drop by tablespoons onto an ungreased cookie sheet, placing them a couple inches apart.


Bake for 11-12 minutes. Let them cool on the cookie sheet for a few minutes, then transfer them to a cooling rack or parchment paper.

Make sure you have a cold glass of milk handy. These are addicting too.....